PTE Headphones & Microphone Position: Tips For Higher Scores!
03 March 2026
Unlike the face-to-face interview in the IELTS exam, the PTE Speaking section is entirely conducted on a computer.
The test centre will assign you a headset to perform this section.
However, many test takers lose marks in both the Speaking and Listening sections due to technical difficulties.
Thus, using PTE headphones properly is one of the key factors to securing the highest possible result on the PTE test.
Be sure to get used to the test centre headsets, buy a similar one to practice first!
This post by PTE Magic will guide you through choosing and setting up your headset and microphone at home to prepare well for your test day.
How to FINALLY Pass the PTE and Achieve Your Dreams
Stop guessing! Start using proven methods that guarantee results!
? Master Every Section: Discover INSIDER SECRETS that secure HIGH SCORES. ? Save Time & Effort: Study SMARTER with proven strategies for FAST results. ? Real Practice, Real Confidence: Practice with TEST-LIKE questions to feel FULLY PREPARED.
START YOUR PTE SUCCESS JOURNEY TODAY
|

Key Takeaways
- Proper use of PTE headphones is one key factor in securing the highest possible result on the PTE test.
- Good quality headphones with microphones are a great help in the PTE exam because you have to listen and speak using the microphone.
- Our PTE experts have tested the Andrea headset with different microphone positions. Below are the pros and cons of each position.
See more:
- Our secret PTE course that has helped thousands of students achieve their desired scores!
Why is a good headset important in a PTE test?
Good quality headphones with microphones are a great help in the PTE exam because you have to listen and speak using the microphone.
A good headset catches your spoken words accurately
A good product helps you listen to the accents spoken clearly. This ensures you will get all the important points.
You may choose standard mobile earphones; however, remember they are not always the best option for catching spoken words at all times.
Moreover, you may experience issues with the audio quality of your voice when recording for the speaking tasks.
You will need to check whether your pronunciation is accurate or your sound quality is good enough. So, prepare yourself with a suitable headset with a mic while practising for the PTE exam.
It eliminates unwanted noises and distractions
A quality headset can allow you to practice in a distraction-free environment and keep your focus and attention in one place.
In the speaking test, you are one of many test takers speaking in the exam room. Therefore, a good pair of headphones and a microphone are a must to avoid the voices of other test takers distracting you or entering your microphone.
A good headset familiarizes yourself with the real testing environment
You should practice with headphones attached to a microphone since it will put you in the same environment as your PTE test.
Furthermore, you will have to wear the headset during the 3 hours of the test.
Wearing headphones for a long time may be a nightmare for many test takers since it is uncomfortable, even causing earaches and headaches. This is because they are not used to wearing something on their head like headphones for so long.
Therefore, you should pick a device similar to the Pearson headsets for practice at home. This will help familiarize you with the sounds and feelings to perform your best on the test.
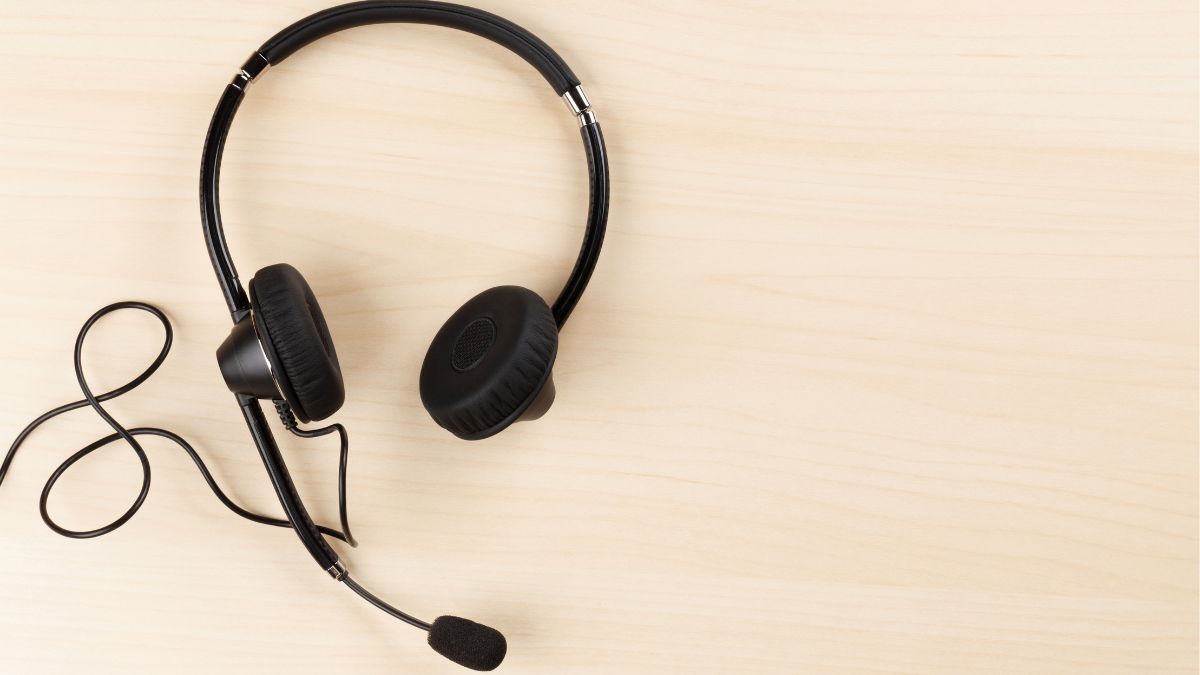
How to choose a good headset for yourself
Headset products will vary depending on the PTE test centre. Pearson headphones are all from Plantronics or Andrea brands.
However, these headphones are pretty expensive and challenging to find. If you’re looking for more affordable alternatives similar to Pearson’s standard headset, you can check out the Logitech and Sennheiser headsets with microphones.
There are wireless headphones as well, though they might not be as reliable.
When choosing headsets for practising the PTE tests, choose the one that has a noise-canceling microphone. This is an essential feature for the most effective self-learning at home.
Besides the sound quality, microphone quality is one of the key factors to consider. You should choose a high-sensitivity microphone to easily and fully capture your voice.
To test comfort, use the headphones for a few days, 2-3 hours each time. This helps you get used to wearing the headset for an extended time.
PTE microphone position setup guide
You have ten minutes to set up your microphone before the Speaking section starts. Ensure your microphone is working correctly. Next, adjust the microphone to your comfort level.
So, how should you put the microphone for the best results?
Our PTE experts have tested the Andrea headset with different microphone positions in a simulated testing room: Lip level, above the nose, and below the lip.
Each position has its pros and cons.
- Placing the microphone above your nose will minimize the breathing sound, but you may hear another’s voice in your recording. Yet, this is not a big issue.
- Placing the microphone below your lip makes the sound clear, but you may have to hold it constantly.
- Do not put the microphone on the same level as your lip because the breathy sounds will make you sound unclear.
After testing many times, the ideal position of the microphone should be:
- Above or parallel to your nose.
- Below your lower lip or close to the chin.
However, there are no rules about microphone position.
Our recommendations for ideal positions may need further adjustment. Therefore, test yourself first to ensure the microphone position works well for recording your voice clearly or audibly.
The most important thing is to avoid breathing or too airy sounds. This will create a burst of air entering the microphone, making your voice incomprehensible to the computer.
If your microphone does not work, immediately ask the Pearson staff to bring you an alternate pair of headsets to check again.
One more thing! Avoid touching the microphone too much and keep all your focus on the Speaking test. Otherwise, you will fail to keep up with the speaking tasks and lose points.
How to test headsets: A quick checklist
Pearson will assign you a computer and a headset with a microphone before the test starts.
Check the system to ensure everything goes right. If you find any technical problems, you must immediately notify Pearson staff to fix the issues before starting your test.
Here is the quick testing equipment checklist before getting ready for the test.
Initial headset checks
Wear it throughout the test as other test takers will speak simultaneously as you.
Adjust its position for your comfort during the 3-hour test.
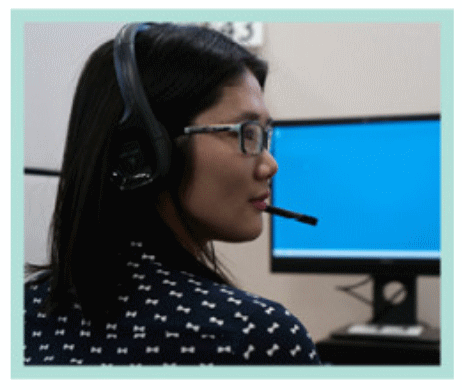
PTE microphone position adjustment
Position the microphone around two fingers distance from your mouth. You can consider our recommendations for ideal locations above.
See the image below to check if your microphone is positioned correctly.
PTE microphone quality check
Test the microphone by speaking a few sentences into the microphone while it records your voice.
You can try some sentences such as “Two blue fish swam in the tank”, “Press the pants and sew a button on the vest”, etc.
Next, listen to it several times and ensure your voice is recorded correctly with no breathing noises or other technical microphone difficulties.
Bluetooth vs cable headphones – which one is better for PTE test-takers?
Cable headphones may be ideal for PTE test-takers.
It will ensure a perfect connection between the computer and the microphone without any minor technical errors.
You may prefer Bluetooth headphones since they are neat and do not get tangled up in cables. However, you will risk losing the wireless connection.
The connection between Bluetooth and the computer system is often unstable, leading to unclear sound or incomplete voice recording. This can make you confused and lose focus on the test.
Therefore, we recommend getting a set of brand-new, high-quality cable headphones for your PTE preparation.
Mistakes to avoid when using your equipment in a PTE test
Mistake 1: Speaking too fast
Speaking as fast as possible is not ideal in the PTE Speaking section. Many students attempt to maintain the pace of their speaking.
Your pronunciation will be sometimes unclear. As a result, the microphone may not capture your spoken words precisely.
Mistake 2: Speak too quietly
Many students speak so quietly that the microphone will miss some of their sentences. Some are even shy to talk and whisper into the microphone.
Mistake 3: Sporadical pauses
Some students frequently pause in the middle of their sentences while speaking. This creates sentences with unnatural gaps resulting in losing points for fluency level.
Mistake 4: Putting the microphone too close to the mouth
Many students worry that their voices cannot be fully recorded. Thus, they need to place the microphone closer to their mouth. This will automatically transmit high-volume frequencies through the microphone.
Even if they reach the ideal speaking level, this mistake can make their speech too loud for the computer to accurately assess their pronunciation.
Solutions
- Practice keeping your voice clear at a regular pace with natural pauses.
- Listen to your recordings again after completing speaking tasks.
- Follow our guide and recommendations to set up your microphone in the right position.
Conclusion
The Speaking section is sometimes a big obstacle for PTE test takers. However, practice makes perfect.
For the most effective preparation, buy yourself a nice pair of PTE headphones with a microphone as a study buddy.
Alright! Have you already got your favourite headset? If yes, remember to position your microphone properly before practising.
Hope our guide will be helpful for your study. Contact us for more PTE Speaking mock tests.
How to FINALLY Pass the PTE and Achieve Your Dreams
Stop guessing! Start using proven methods that guarantee results!
? Master Every Section: Discover INSIDER SECRETS that secure HIGH SCORES. ? Save Time & Effort: Study SMARTER with proven strategies for FAST results. ? Real Practice, Real Confidence: Practice with TEST-LIKE questions to feel FULLY PREPARED.
START YOUR PTE SUCCESS JOURNEY TODAY
|
My name is Moni, and I am a seasoned PTE teacher with over 6 years of experience. I have helped thousands of students overcome their struggles and achieve their desired scores. My passion for teaching and dedication to my students success drives me to continually improve my teaching methods and provide the best possible support. Join me on this journey toward PTE success!